Why Your Winter Laundry Load is Stuck with a Cold Dryer

As the temperatures drop and the winter season sets in, it’s not uncommon to encounter some unexpected challenges around the house. One of the most frustrating issues that can arise is a dryer not heating properly. Not only does this disrupt our daily routines, but it also leaves us with a pile of damp laundry that refuses to dry. If you’re currently facing this problem, don’t worry, you’re not alone. In this blog post, we’ll explore several reasons why your dryer may not be heating during the winter months and provide some solutions to get it back up and running. Say goodbye to cold laundry loads and hello to warm, dry clothes once again!

DIY Troubleshooting for a Cold Dryer

If you’re dealing with a cold dryer during the winter months, there are a few DIY troubleshooting steps you can take before calling in the professionals. First, double-check that the power supply to your dryer is working properly. Sometimes, a simple tripped circuit breaker or blown fuse can be the cause of the issue. Reset the breaker or replace the fuse if necessary.

DIY-troubleshooting-for-a-cold-dryer

It seems simple. But sometimes, the reason your drying machine lacks heat is because a tripped circuit breaker or blown fuse. Check and reset as necessary if you’re experiencing this issue.

Next, take a look at the heating element. Over time, these elements can wear out and stop functioning effectively. To test it, use a multimeter or consult a professional for assistance. If you discover that the heating element is faulty, it may need to be replaced.

Another potential culprit could be clogged dryer vents. Lint and debris can accumulate over time, restricting airflow and preventing your dryer from heating efficiently. Regularly cleaning out the vents can help prevent this problem.

Lastly, consider the thermostat. If it’s malfunctioning, it may not be regulating the temperature properly, leading to a non-heating dryer. Test the thermostat or seek professional help to diagnose and replace it if needed.

By following these DIY troubleshooting steps, you may be able to solve the issue and get your dryer back up and running without having to call in the experts.

When to Call in the Professionals: Signs Your Dryer Needs Expert Repair

If you’ve gone through the DIY troubleshooting steps and your dryer is still not heating during the winter months, it may be time to call in the professionals. While it can be tempting to try and fix the issue yourself, there are certain signs that indicate your dryer needs expert repair.

One of the first signs that your dryer requires professional attention is if the heating element is visibly damaged or burnt out. If you notice any frayed wires, cracks, or discoloration on the heating element, it’s best to leave the repairs to the experts. Attempting to fix a faulty heating element without proper knowledge can be dangerous and may result in further damage to your dryer or even pose a fire hazard.

Another clear sign that it’s time to call in the professionals is if your dryer continues to not heat up after attempting the DIY troubleshooting steps. This could indicate a more complex issue that requires specialized tools and expertise to diagnose and repair.

Lastly, if you’re unsure of how to properly test or replace components such as the thermostat or heating element, it’s always better to seek professional help. They have the knowledge and experience to accurately diagnose the problem and ensure a safe and effective repair.

Remember, it’s important to prioritize safety and leave any complicated repairs to the experts. Don’t hesitate to contact a professional dryer repair service if you’re experiencing persistent heating issues with your dryer.

Tips for Preventing Future Dryer Heating Problems

To prevent future dryer heating problems and ensure your laundry loads stay warm and dry all winter long, there are a few simple tips you can follow. First and foremost, make sure to clean out your dryer vents regularly. This will prevent lint and debris from building up and restricting airflow, which can lead to heating issues. Additionally, check the vent hose and make sure it’s not kinked or blocked in any way.

tips-for-preventing-future-dryer-heating-problems

Cleaning your dryer vents regularly prevents lint and debris from building up and restricting airflow.

Another tip is to avoid overloading your dryer. While it may be tempting to fit as much laundry as possible into each load, overloading can strain the dryer’s heating element and reduce its efficiency. Instead, opt for smaller, more manageable loads that allow for proper airflow.

It’s also important to check your dryer’s exhaust vent outside of your home. Ensure it’s clear of any obstructions like leaves or debris, as these can also impede airflow.

Lastly, consider investing in a dryer vent cleaning kit. These kits typically come with brushes and rods that can reach deep into the vents to remove stubborn lint buildup. Regularly using a vent cleaning kit can significantly reduce the risk of future heating problems.

By following these preventative tips, you can keep your dryer running smoothly and avoid the frustration of a cold laundry load during the winter months. Stay proactive and enjoy warm, dry clothes all season long!

And if you need help, remember, we’re only a click away. Contact us today!

Is Your Furnace Guilty of Stealing Your Hard-Earned Money?

Are you experiencing sky-high energy bills despite not using any more electricity than usual? If so, your furnace may be to blame. With the winter months bringing colder temperatures and more frequent use of your heating system, it’s important to make sure your furnace is operating efficiently and not costing you more money than necessary. Regular maintenance and repair are key to avoiding unnecessary furnace repair costs. Read on to learn more about how to keep your furnace running smoothly and your energy bills low.

Understanding the Connection between Your Furnace and Energy Bills

Your furnace plays a significant role in your energy consumption, especially during the cooler months, and can greatly impact your monthly bills. During the winter, for example, your furnace works tirelessly to keep your home warm. But if it’s not operating efficiently, it can consume more energy than necessary. This means your energy bills will reflect the extra energy your furnace is using.

Regular maintenance is crucial to ensure your furnace is operating at its best. Cleaning or replacing filters, checking and adjusting thermostat settings, and inspecting the furnace for any wear and tear can go a long way in improving efficiency and reducing energy costs.

Maintaining your furnace ensures it will always operate at peak performance.

Now that we understand the relationship between your furnace and energy costs, in the next sections, we will explore the signs that indicate your furnace is to blame for high energy bills, the reasons why this may be happening, and effective solutions to improve your furnace’s efficiency and lower your monthly utility payment.

Signs that Your Furnace May Be the Culprit Behind High Energy Bills

As much as we rely on our furnaces to keep us warm during the winter months, as mentioned, you want to ensure they’re in tip-top shape. Look out for these signs:

  1. Constantly running: If your furnace seems to be running non-stop, even when your home is already at a comfortable temperature, it could be a sign of an inefficient furnace. This constant cycling can result in higher energy consumption and ultimately, higher bills.
  2. Uneven heating: Do you notice some rooms in your home are colder than others? This could indicate that your furnace is struggling to distribute heat evenly. As a result, you may be cranking up the thermostat in those colder rooms, leading to increased energy usage.
  3. Strange noises: If your furnace is making banging, rattling, or squealing noises, it could be a sign of underlying issues. These issues can cause your furnace to work harder than it needs to, using more energy in the process.
  4. Old age: Like any appliance, furnaces have a lifespan. If your furnace is over 15 years old, it may not be as efficient as newer models. Older furnaces often require more energy to produce the same amount of heat, leading to higher energy bills.

If you notice any of these signs, it’s important to have your furnace inspected by a professional. They can diagnose any problems and provide solutions to improve your furnace’s efficiency and lower your energy bills.

Other Reasons Why Your Furnace Is Causing High Energy Bills

As much as we rely on our furnaces to keep us warm during the winter months, they may be other reasons behind monthly “sticker shock” in the winter. Let’s take a closer look.

One possible reason is poor insulation. If your home is not properly insulated, the warm air generated by your furnace can easily escape, forcing your furnace to work harder and consume more energy in order to maintain a comfortable temperature. Insufficient insulation in the walls, attic, or windows can all contribute to this problem.

how to reduce energy bills

Insulation is a simple, cheap, easy (yet often overlooked) way to improve the energy efficiency of your home including its furnace.

Another common cause is air leaks. When there are gaps or cracks in your home’s windows, doors, or ductwork, cold air from outside can seep in, causing your furnace to work overtime to compensate for the loss of heat. These air leaks not only lead to higher energy bills but also result in an uncomfortable living environment.

Finally, aside from age, it’s also important to consider the general condition of your furnace itself. A poorly maintained furnace can experience issues such as dirty or clogged filters, worn-out parts, or malfunctioning thermostats. These problems can cause your furnace to work less efficiently and use more energy than necessary.

We Can Help

Yes, your furnace is an absolute requirement in the winter months. But it doesn’t have to consume your monthly heating bills.

By learning the cautionary signs, exploring the reasons behind poor furnace performance and implementing several solutions to mitigate these issues, you can ensure that your furnace is not stealing your hard-earned money through unnecessarily high energy bills. Taking proactive steps to maintain and optimize your furnace will not only save you money but also contribute to a more comfortable and energy-efficient home. So, don’t wait any longer—start implementing these solutions today and enjoy the benefits of a more efficient furnace and lower energy bills. Contact us today!

5 Indicators You Can’t Ignore for Water Heater Repair

Are you worried that your water heater may be on its last leg? If so, then it’s important to be aware of the warning signs that could indicate a need for water heater repair. From strange noises to an unreliable hot water supply, there are several telltale indicators that can alert you to an impending water heater issue. Read on to discover five of the most common symptoms that signify you may need to have your water heater serviced.

1) Increased Heating Time

If you find yourself waiting longer and longer for your water to heat up, it could be a sign that your water heater is in trouble. Increased heating time is a common symptom of a failing water heater, and it’s not something you should ignore.

There are a few reasons why your water heater might be taking longer to heat up. One possibility is that the heating element is wearing out or malfunctioning. Over time, the heating element can become coated with sediment, which reduces its ability to heat the water efficiently. Another possible cause is a buildup of mineral deposits in the tank, which can also hinder the heating process.

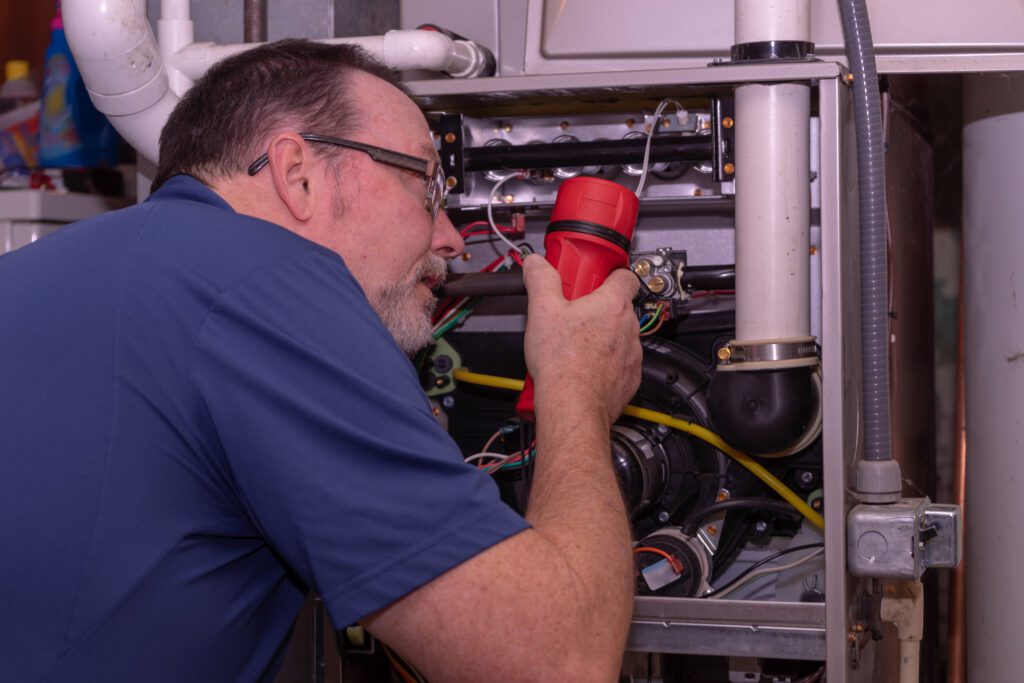
Regardless of the cause, if you notice that your water is consistently taking longer to heat up, it’s a good idea to have your water heater inspected by a professional. They can diagnose the issue and recommend the appropriate repairs. Ignoring the problem could lead to further damage and potentially even a complete breakdown of your water heater.

2) Rust or Corrosion on the Tank

Rust or corrosion on your water heater tank can be a major red flag that your unit requires repair. While it may be easy to dismiss some rust or discoloration as normal wear and tear, it’s important not to ignore it. Rust can weaken the tank and cause leaks, leading to potential water damage in your home.

Corrosion can also be a sign of a failing water heater. It can indicate that the sacrificial anode rod, which is responsible for attracting corrosive elements in the water, is no longer functioning effectively. When the anode rod is depleted, the tank itself becomes vulnerable to corrosion.

If you notice any rust or corrosion on your water heater tank, it’s crucial to address the issue promptly. Call a professional water heater repair technician who can assess the situation and determine the best course of action. They may recommend replacing the anode rod or even the entire tank if the corrosion is severe. Acting early on can help prolong the lifespan of your water heater and prevent further damage to your home.

rust

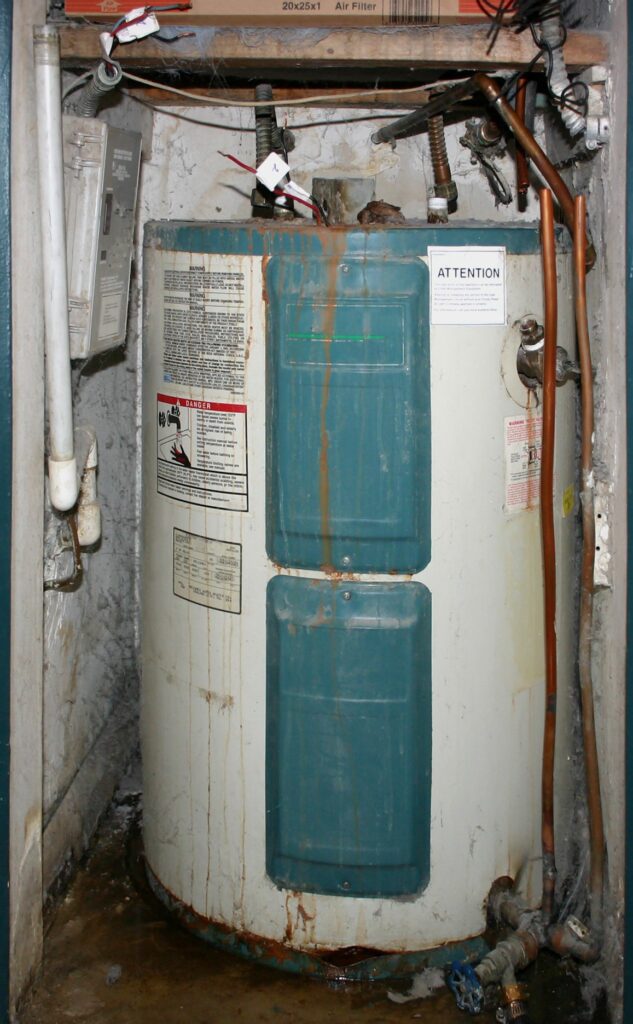
Rust and/or corrosion on your water heater is an indicator that something is likely wrong with the unit and requires immediate service and attention.

3) Strange Noises Coming from the Tank

Is your water heater making strange noises that have you on edge? Don’t worry, you’re not alone. Strange noises coming from the tank are one of the most common indicators that your water heater needs repair. These noises can range from banging and clanging to hissing and popping sounds. While it may be tempting to ignore these sounds and hope they go away, it’s important to address them promptly to avoid further damage to your water heater.

One possible cause of these strange noises is a buildup of minerals and debris at the bottom of the tank. Over time, these items can accumulate, creating a layer of sediment that interferes with the proper functioning of the heater. This accumulation can result in the tank overheating, leading to those unsettling sounds. Another potential culprit is a faulty heating element or a loose part inside the tank.

4) Leaks Around the Water Heater

Leaking around your water heater is not a symptom you can afford to ignore. Even a small leak can quickly escalate into a major issue, causing water damage to your home and potentially leading to costly repairs that are commonly not covered under insurance. If you notice water pooling around the base of your water heater or dripping from the pipes or fittings, it’s important to take immediate action.

There are a few potential causes of leaks around your water heater. It could be a loose or damaged pipe connection, a faulty temperature and pressure relief valve, or even a cracked tank.

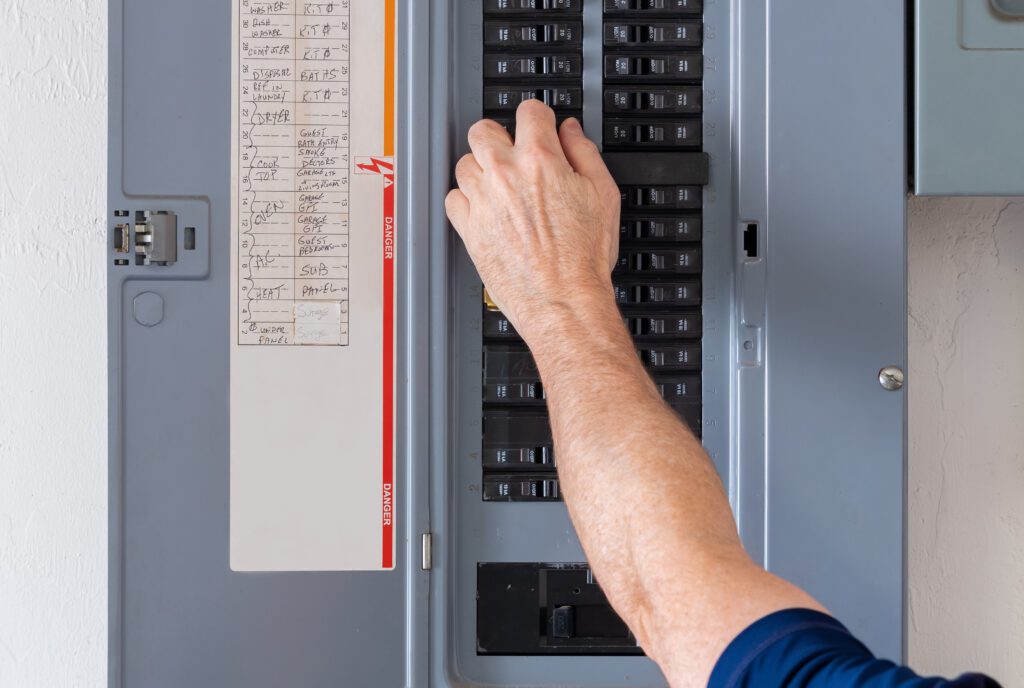
If you see this occurrence, the first step to mitigation is to turn off the power and water supply to the water heater. This will help minimize any potential damage while you wait for a professional to assess the situation. They may need to replace a faulty valve, tighten loose connections, or, in some cases, replace the entire unit. It’s important not to attempt any repairs yourself, as working with water heaters can be dangerous without the proper knowledge and experience!

leak

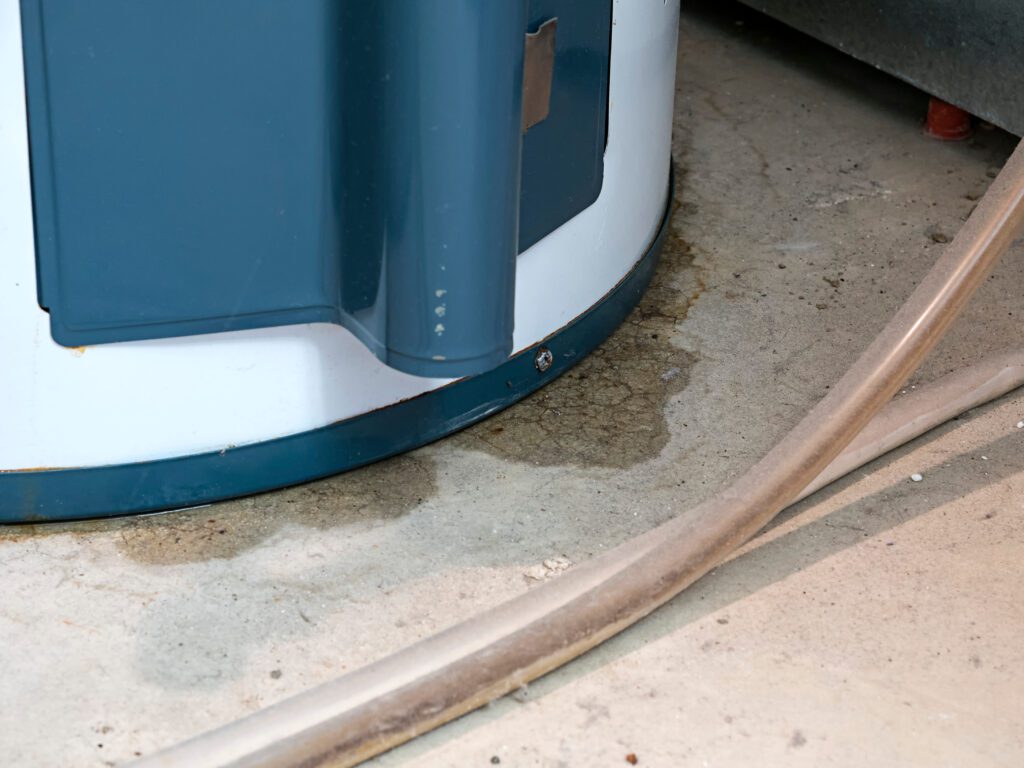
If you notice your water heater leaking, even a little bit, it could be a sign of something greater (and potentially more costly) about to occur. Call your local professional immediately!

5) Age of the Water Heater

Over time, your water heater will inevitably start to show signs of age. The average lifespan of a water heater is around 8 to 12 years, depending on the type and maintenance. As your water heater gets older, it becomes more prone to issues and inefficiencies. It’s important to be aware of the age of your water heater and the potential problems that can arise.

As mentioned, the most common issue with an older water heater is sediment buildup. Excess accumulation can hinder the heating process and decrease the efficiency of the unit, resulting in longer heating times, reduced hot water supply, and even strange noises. Additionally, an aging water heater may develop leaks or corrosion, which can lead to water damage in your home.

If your water heater is nearing the end of its expected lifespan, it’s wise to consider replacing it before it fails completely. Upgrading to a new, energy-efficient water heater can not only prevent unexpected breakdowns but also save you money on your utility bills.

We Can Help

There are several indicators that your water heater may need repair. From increased heating time to strange noises coming from the tank, these signs should not be ignored. Rust or corrosion on the tank and leaks around the water heater are also red flags that should be addressed promptly. Additionally, considering the age of your water heater is important, as older units are more prone to issues and inefficiencies.

If you notice any of these symptoms, act immediately. Ignoring the warning signs can lead to more extensive damage, costly repairs, and potential water damage in your home. Contact us today and we’ll be happy to review your situation with practical solutions for your budget and needs!

Don’t Get Stuck with Dirty Filters: The Ultimate Oil Tank Filter Guide

Are you looking for an innovative way to keep your oil tank clean and its filters in top condition? Look no further! In this guide, you’ll learn everything you need to know about maintaining the performance of your oil tank’s filters. We’ll cover how to change them, clean them, and even provide some tips on how to extend the life of your filters. Don’t get stuck with dirty filters—let this ultimate oil tank filter guide help you out!

The Importance of Regular Oil Tank Filter Maintenance

maintenance

Maintaining and having your oil tank regularly serviced is crucial to the lifespan of your oil tank system.

Regular oil tank filter maintenance is crucial for ensuring the efficiency and longevity of your oil tank system. Ignoring or neglecting this important task can lead to a host of issues that can be costly to repair and inconvenient to deal with.

One of the main reasons why regular oil tank filter maintenance is important is because it prevents the accumulation of dirt, debris, and sludge in your filters. Over time, these particles can clog the filters and restrict the flow of oil, causing your heating system to work harder and consume more energy, resulting in higher energy bills. By regularly cleaning or replacing your oil tank filters, you can ensure that your system is operating at its optimal level and prevent unnecessary strain on your heating system.

Another reason why regular oil tank filter maintenance is important is for prevention. Dirty filters can also lead to a buildup of contaminants in your overall system, which can ultimately damage the tank and its components. This obstruction can lead to leaks, malfunctions, and even potential environmental hazards. By regularly maintaining your oil tank filters, you can prevent these issues from occurring.

Finally, regular oil tank filter maintenance is also an educational opportunity. By getting into the habit of checking and cleaning or replacing your filters, you become more familiar with the inner workings of your oil tank system. This knowledge can help you identify any potential issues or abnormalities early on, allowing you to seek the necessary repairs or professional assistance before the situation worsens.

Tools You Need to Change and Clean Your Filter

tools

Ensuring you have the proper tools to change and clean your oil tank filter is essential to keeping your system in tac.

When it comes to changing and cleaning your oil tank filter, having the right tools can make all the difference. While the specific tools needed may vary depending on your specific oil tank system, there are some essential items that you’ll need to have on hand:

  1. First and foremost, you’ll need a pair of protective gloves. Gloves ensure your safety and prevent any direct contact with the oil or any potentially harmful contaminants. Additionally, you’ll want to have a bucket or container to collect any oil that may spill during the process.
  2. Next, you’ll need a wrench or pliers to loosen and remove the filter housing. These tools allow you to access the filter itself for cleaning or replacement. Make sure to choose a wrench or pliers that are the right size and type for your specific oil tank system.
  3. In some cases, you may also need a screwdriver or socket wrench to remove any screws or bolts that are holding the filter housing in place. Again, it’s important to have the right size and type of tool to avoid damaging any components of your oil tank system.
  4. Lastly, having a clean cloth or rag can be handy for wiping away any dirt or debris from the filter housing or surrounding areas.

If you’re unsure about the specific tools needed for your oil tank system, it’s always best to consult a professional or an expert in the field.

Follow These Steps to Change Your Oil Tank Filter with Ease

steps tanks

It is important to know that changing your oil tank filter is an easy process that can be done by anyone as long as they have the proper tools and knowledge.

Changing your oil tank filter is a relatively simple process that can be done by anyone with a little guidance and the right tools (see above). Here’s a step-by-step guide to help you get started:

  1. Make sure you’re wearing your protective gloves during this process.
  2. Begin by turning off your oil tank’s power supply. This action will prevent any accidents or injuries while you’re working on the filter.
  3. Locate the filter housing, which is typically located near the oil tank. Use your wrench or pliers to loosen and remove the housing cover. Be careful not to damage any components in the process.
  4. Once the housing cover is removed, you can access the old filter. Carefully remove the old filter from the housing, taking note of its orientation.
  5. Take your new filter and place it in the housing, making sure it’s in the same orientation as the old one. Double-check that it fits securely in the housing.
  6. Replace the housing cover and tighten it with your wrench or pliers. Make sure it’s secure, but avoid overtightening to prevent damage.
  7. Finally, turn the power supply back on and check for any leaks or abnormalities. If everything looks good, you’re all set!

Remember, if you’re unsure about any step or encounter any difficulties, it’s always best to consult an expert or a professional from Valiant Energy Solutions.

Utilize These Steps to Clean Your Oil Tank Filter

tank

Making sure your oil tank filter is clean is essential in prolonging the longevity of the filter.

Now that you know how to change your oil tank filter, it’s time to learn how to clean it. Cleaning your oil tank filter is the key to efficiency:

  1. First, ensure that all proper safety measures are taken. This step includes putting on your protective gloves for this process.
  2. Start by turning off the power supply to your oil tank to avoid any accidents or injuries during the cleaning process.
  3. Locate the filter housing, which is typically near the oil tank. Use your wrench or pliers to remove the housing cover carefully.
  4. Take out the filter from the housing and inspect it for any dirt or debris. If it appears clogged or dirty, it’s time for a thorough cleaning.
  5. Prepare a bucket or container filled with warm soapy water. Gently immerse the filter in the water and use a soft brush or cloth to scrub away any dirt or grime. Be sure to clean both sides of the filter thoroughly.
  6. Rinse the filter with clean water to remove any soap residue. Make sure to wash away all the dirt and debris from the filter.
  7. Allow the filter to dry completely before reinserting it into the housing. Ensure it is dry to avoid any moisture buildup in the filter.
  8. Put the filter back into the housing and securely fasten the housing cover using your wrench or pliers.
  9. Turn the power supply back on and check for any leaks or abnormalities. If everything looks good, congratulations, you’ve successfully cleaned your oil tank filter!

Cleaning your oil tank filter should be done regularly to maintain its efficiency. By following this step-by-step guide, you can keep your oil tank running smoothly and prevent any potential issues caused by dirty filters.

We Can Help 24/7

At Valiant Energy Solutions, we believe that regular oil tank filter maintenance is a service that lasts. By dedicating time and effort to properly maintain your filters, you can extend the lifespan of your oil tank, prevent costly repairs, and ultimately save money on energy bills. Don’t overlook the importance of regular maintenance – let us help you keep your oil tank clean and efficient for years to come. DIY is great, but let us take the guesswork out of the process and save you time and money.

Contact us today to learn more about our services and how we can assist you with your oil tank filter needs.

Best Practices for Home Generator Maintenance: Embrace Innovation and Extend Its Lifespan

We all know that generators provide a reliable source of power in times of need, but keeping them running for years to come requires more than just flipping a switch. Home generator maintenance is becoming increasingly important as we embrace innovation and strive to extend the lifespan of these vital machines. Whether you’re just getting started with your first generator or are a seasoned pro, understanding the basics of generator maintenance is key to ensuring a long and successful lifespan. In this blog, we’ll explore the future of home generator maintenance and service tips that will help you keep your generator running for years to come.

Understand The Importance of Home Generator Maintenance

Neglecting proper maintenance can lead to a decrease in performance and even irreversible damage. Statistics reveal that more than 70% of generator failures occur due to poor maintenance practices. This alarming number highlights the need for homeowners to prioritize generator maintenance. Regular servicing ensures optimal performance and ultimately saves homeowners from expensive repairs or replacements down the line.

It is essential to understand that a home generator consists of various key components, including the engine, alternator, and fuel system. Each component has a specific lifespan, and regular maintenance helps to identify and address any potential issues before they become major problems. Regular maintenance is not only about ensuring the longevity of the generator but also about ensuring its reliability during power outages. When a storm hits or an unexpected power outage occurs, having a properly maintained generator ensures that your home continues to function smoothly, providing peace of mind and comfort for you and your loved ones.

Innovations in Generator Maintenance

Innovative approaches to generator maintenance have revolutionized the way homeowners can ensure the longevity and optimal performance of their generators. With advancements in technology, generator maintenance has become more efficient and effective than ever before. From smart monitoring systems that provide real-time data on the generator’s performance to automated maintenance reminders, these innovations make it easier for homeowners to stay on top of their generator maintenance responsibilities.

When it comes to the best home generator brands for Connecticut, Generac stands out as a top choice. This innovative company provides powerful generators that are both trustworthy and reliable. Generac boasts a wide variety of residential, commercial, and industrial generators, making them the perfect choice no matter the size or type of generator needed. From automatic standby generators to portable generators, Generac has a solution to fit any budget and household.

Generac is a reliable generator brand that has a solution to fit any budget and and need, including portable home generators.

Best Practices for Home Generator Maintenance

  1. Regular Inspections: One of the best practices for maintaining an efficient home generator is to schedule regular inspections by a professional. These experts have the knowledge and experience to identify any potential issues and address them before they escalate into major problems. Generac recommends an annual inspection to ensure your generator is running smoothly and efficiently.
  2. Keep it Clean: Another important practice is to keep your home generator clean and free from debris. Regularly clean the air intake and exhaust vents to prevent blockages that can hinder its performance. Additionally, ensure that the surrounding area is free from clutter or vegetation that could obstruct proper ventilation.
  3. Battery Maintenance: The battery is a crucial component of your home generator. It is important to check the battery regularly, clean its terminals, and ensure it is properly charged. Consult the manufacturer’s guidelines or seek advice from professionals to determine the appropriate battery maintenance routine for your specific generator model.
  4. Fuel Maintenance: To keep your generator running efficiently, it is essential to maintain the fuel system. Regularly test and replace the fuel, and make sure it is stored in a clean and properly labeled container. Fuel should be stabilized to prevent degradation, and the fuel filters should be replaced as recommended by the manufacturer.
  5. Exercise the Generator: Regularly exercising your home generator helps maintain its overall performance. Experts recommend running the generator at least once a month for 20-30 minutes, ideally under a moderate load. This exercise helps lubricate the engine, charge the battery, and keeps the generator ready for use during power outages.

By following these best practices, you can ensure that your home generator remains efficient, reliable, and ready to power your home when you need it most. Remember, it’s always a good idea to consult professionals and refer to the manufacturer’s guidelines for specific maintenance instructions.

Owning a home means understanding the importance of maintaining your home generator and ensuring it meets manufacturer recommended standards and best practices.

Hiring Professional Services for Home Generator Maintenance

When it comes to ensuring the longevity and reliable operation of your home generator, there’s no substitute for the expertise and professionalism of a trusted service provider. That’s where Valiant Energy Solutions comes in. With a team of dedicated experts in home generator maintenance, we are well-equipped to handle all your maintenance needs.

Our professionals are trained to understand the intricacies of home generator systems and are equipped with the latest tools and techniques to provide top-notch service. From routine inspections and tune-ups to major repairs, we have the knowledge and experience to keep your generator running smoothly for years to come.

One of the key advantages of hiring professional services for home generator maintenance is the peace of mind that comes with knowing the job is being done right. Our team is familiar with all makes and models of home generators, so you can trust that we have the expertise to identify any potential issues and address them promptly. In addition to our technical expertise, our professionals are also well-versed in safety regulations and guidelines. This ensures that all maintenance work is carried out in compliance with industry standards, reducing the risk of accidents or damage to your generator.

When it comes to the future of home generator maintenance, it’s clear that embracing innovation and relying on professional services is the way to go. At Valiant Energy, we have the capability and expertise to handle the full installation including propane, which sets us apart from other providers in Connecticut.

Contact Valiant Energy Solutions today to schedule an appointment with our experts and take the first step towards extending the lifespan of your home generator. And, if you don’t currently own a home generator, our team of solutions experts can assist by selecting the best option that suits your family and your budget.

The Top 4 Benefits of Installing an EV Charging Station at Home

The electric vehicle (EV) revolution has been gaining momentum, and with it comes the need for convenient EV charging stations. In Connecticut, home electric vehicle chargers have become a must-have for many EV owners. According to a report released by the Connecticut Green Bank, the number of registered electric vehicles in Connecticut has quadrupled since 2016, from 2,884 to 11,608 as of June 2020. While most of the charging still takes place at designated public charging stations, the convenience of having an EV charging station at home is hard to beat. Whether you own a Tesla, Chevy Bolt, or Nissan Leaf, having a reliable EV charging station at home, such as a ChargePoint station, is one of the most essential functions for EV charging.  

Installing an electric vehicle charging station in your home can not only add convenience to your daily life, but also allow for financial and environmental benefits as well. 

Optimize Your Efficiency and Safety 

One of the key benefits of owning an electric vehicle charging station at home is the convenience. Having an EV charger installed right in your driveway means you can charge up your car quickly and easily without having to drive long distances to a public charging station. This not only makes it easier to keep your car charged, but it also saves you time and money that would otherwise be spent searching for and driving to a public station. 

Another major benefit of owning an EV station at home is the ability to customize the charging speeds and types available. At Valiant Energy, we partner with a trusted leader in EV technology, ChargePoint. Their stations offer a range of charging speeds from level 1 (3.6kW) to level 3 (50-500 kW). Level 1 is generally used for plug-in hybrids that require only a low charge, while level 3 is suitable for full battery electric vehicles that need the fastest available charging rate. As EV technology continues to evolve, it is important to have an electric vehicle station that allows for charging at different levels to meet the needs of different vehicles.  

The cost savings associated with owning an EV charging station can also be substantial. Installing a station at home can be significantly less expensive than renting or leasing a public station, making it an attractive option for many EV owners. According to statistics compiled by EV station, the average cost of installing a Level 2 station at home ranges from $650 to $2,500. Furthermore, many electric utilities offer incentives and discounts for customers who install an EV station, resulting in even greater cost savings.  

Finally, safety matters. Our partners at ChargePoint confidently ensure their equipment comes with state-of-the-art safety features that are invaluable. All electric vehicle stations come with self-locking plugs and power cords that help prevent theft and tampering. Additionally, many stations feature built-in monitoring systems that can detect potentially dangerous conditions and alert you if there is an issue. This helps ensure that your EV station is always safe and secure.  

Electric vehicle charging stations allow for convenience, cost savings, and safety features which are essential factors when it comes to owning an electric vehicle. 

When it comes to EV charging at home, ChargePoint stations are a top contender and smart investment. Not only do they provide the convenience and cost savings of having a charger close by, but their safety features help keep your car and home secure. With the increasing popularity of EVs, it’s more important than ever to make sure you have a dependable and efficient charging station at home. 

If you are ready to explore EV charging station options at your home or in your neighborhood, our solutions experts can meet with you to discuss options and showcase equipment so that you can make an informed decision. What are you waiting for? Contact our renewable energy team today.